Those who know me well know that while I have creative ideas, my artistic talents are subpar at best. Still, I’m finding myself more and more interested in DIY projects lately. As I’m settling into my home, my former self-doubt is being replaced with a more confident, adventurous spirit... Well, at least when it comes to being crafty. For my office, I decided to get creative when it came to a desk chair. Instead of buying a standard swivel, I decided to tackle a project I saw on Pinterest where a basic padded folding chair is given a more personalized touch. I thought this would be a perfect, inexpensive way to add a pop of personality to my work station.
Here’s the original link from Pinterest:
And here’s my way...
Materials:
- folding chair (I got mine at Walmart for $18)
- 2 cans of spray paint (Yes, you need 2 cans for each chair!)
- a 20x20 piece of fabric I bought a yard of fabric, each yard of fabric would be enough for 4 chairs
- screwdriver
- staple gun, or a hot glue gun
Directions:
Step 1- I used a screwdriver to remove the padded seat from the metal frame.
Step 2- Dave suggested that I gently rub the metal with sandpaper to help the spray paint adhere better. After lightly sanding, he also had me wipe it with some carb cleaner (yes, the automotive stuff). This is not required, and was not in the original directions, but I do believe it helped the paint adhere better to the chair, especially since we didn’t use a primer on the black frame. 
Step 3- I sprayed the chair frame with a coat of paint (I used Bright Idea by Krylon, $5.99, a creamy sunshine yellow). I let the first coat dry for the time recommended on the paint can and added a second coat covering the chair. I do not recommend spray painting outdoors at night in the wind like we did. It created a bit of a worn, rustic effect on parts of the chair. This ended up working for us since other furniture in the room shares a similar finish, so it was a not a big deal, but if that’s not the look you’re after, I’d stick to painting in a well-lit, well-ventilated location.
Step 4- While the chair was drying, I took the yard of fabric (I choose a bright print from Hobby Lobby, $7.99 per yard), which was already folded into quarters, and cut it. I used one quarter of the fabric, or roughly a 20x20 inch piece. I arranged the fabric on the chair pad and then flipped the pad over and secured the fabric to the underside of the chair pad. I used a hot glue gun for this, but a staple gun is another option. If you use hot glue, let it set for a few minutes before moving on to step 5.

Step 5- When the chair frame was dry and the pad was covered, I used my screwdriver to put it all back together again.

The final product...

My overall reaction: I absolutely love my chair. While I do notice some slight imperfections, I think it’s a super cute addition to my office. It wasn’t as cheap as I thought it would be (approximately $35), but for a custom pop of color that reflects my style, I felt it was still very affordable and took less than an hour from start to finish. I definitely think this is an awesome DIY project for a novice like myself. I felt that I could complete the steps easily, and I’m looking forward to making more in a wider variety of colors and fabrics. Goal for my next project: Better photography!
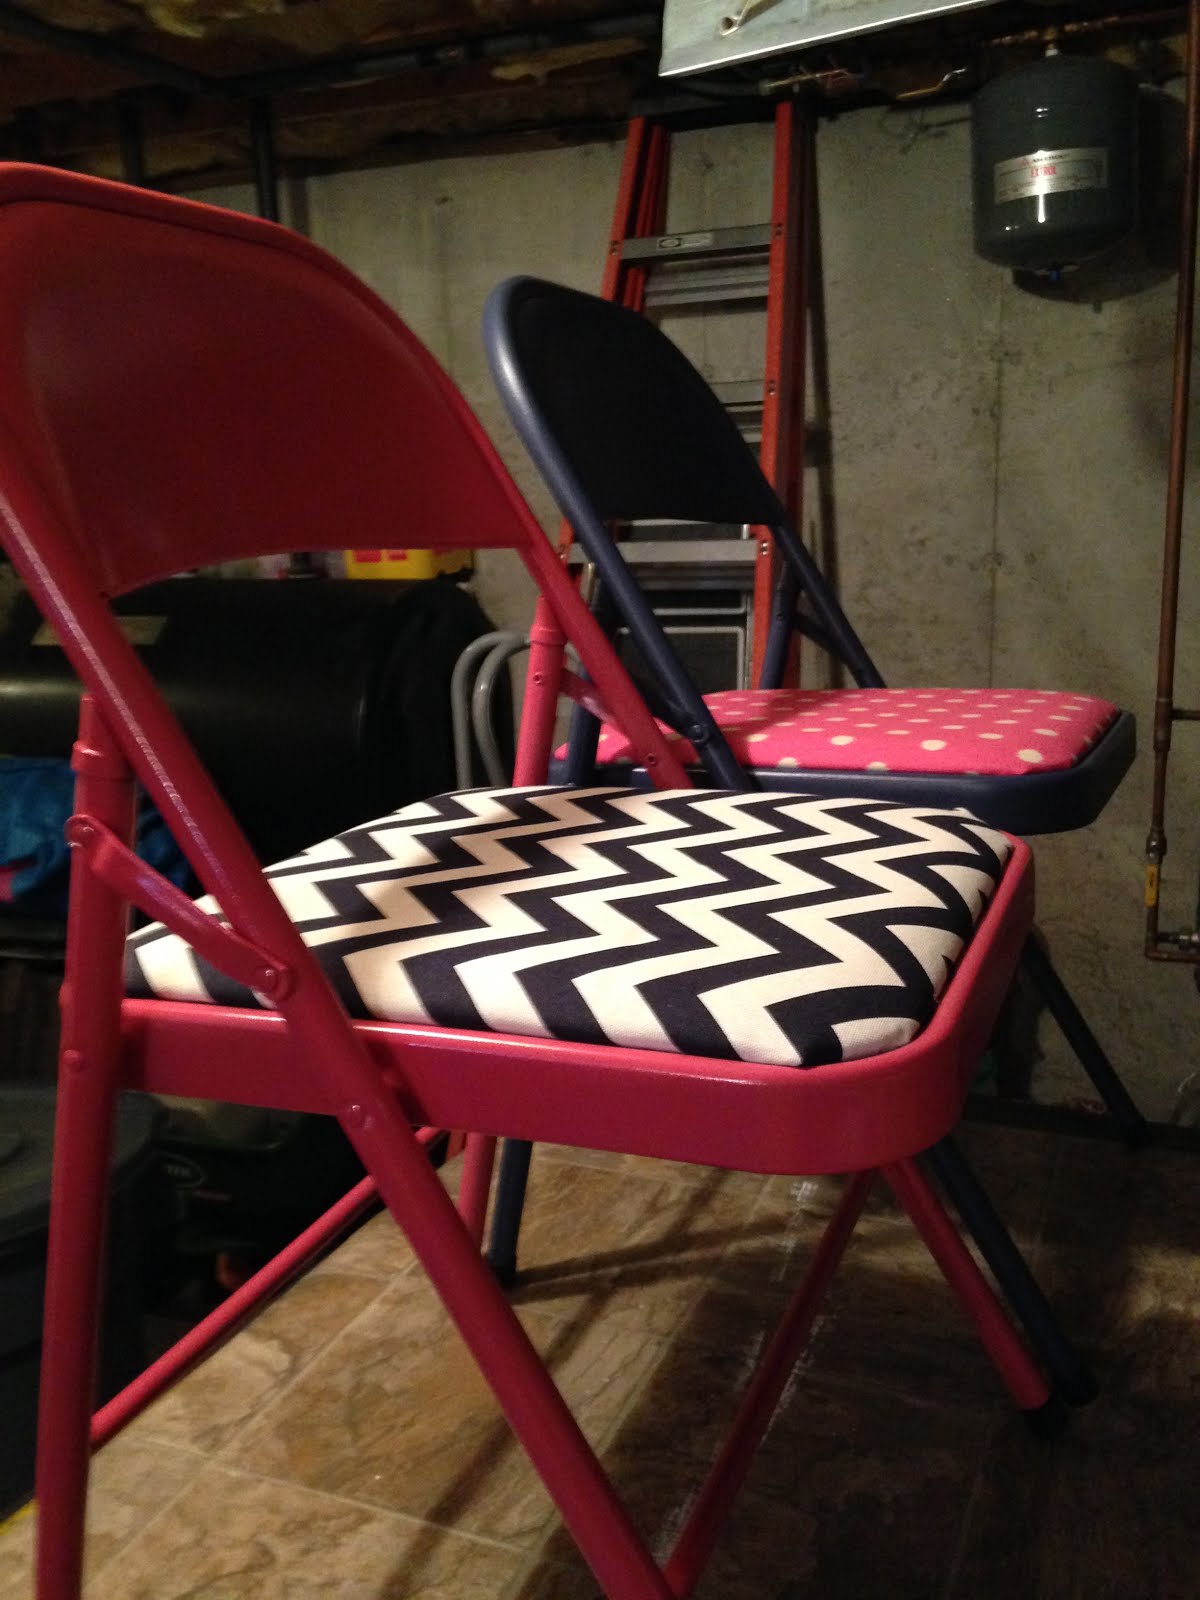
Update: I completed this project for the second time. My friend Tracy is marrying her lady love Katie and extra chairs are always great for having people over. I made them some that go with their wedding colors. This time I used Oxford Blue satin finish spray paint and watermelon semi-gloss, both from Krylon. The fabric is from Hobby Lobby. I find that each chair uses a quarter yard of fabric, but that might differ depending on the size of the seat. I used the same folding chairs from Walmart that I used the first time ($18.94). Total cost for two chairs was $58.00. That included a half yard of each fabric and two cans of each color spray paint. All in all, a pretty cheap way to freshen up something simple and add a cute little touch when entertaining.
No comments:
Post a Comment