I’m no Stepford wife, but I love a good seasonal craft. If the kids can get involved, it’s even better. And, if we can start with scrap materials we have laying around, everybody wins. Here are two we tried this year:


What we had leftover: fabric scraps.
What we made: Fabric Covered Pumpkins
What else we needed: modge podge (we used the kids’ version), foam brushes, plastic pumpkins
How we did it: My neighbor and I cut strips out of our fabric scraps. We applied modge podge to the backs of the strips with the foam brush and applied them to the plastic pumpkin. After setting each strip, we applied another layer of modge podge on top. Some of us stuck to one fabric, while others decided to mix and match. I had to help the younger kids a bit with the fabric placement, but all the kids (ages 3-12) and us adults (ages withheld) had a fun time getting creative.

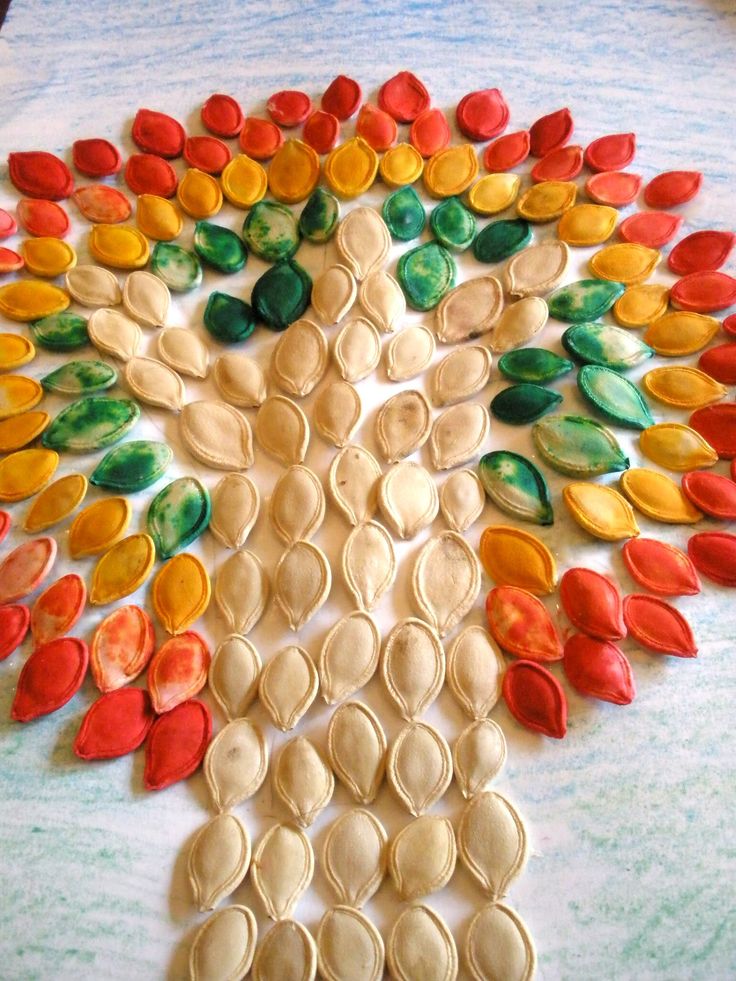
What we had leftover: squash seeds.
What we made: Squash Seed Foliage
What else we needed: food coloring; ziploc bags; brown paint, construction paper, crayons, colored pencils, or markers (anything to make trunk and branches); paper or canvas
How we did it: We used the seeds from the squash in our garden. I had the kids scoop the seeds into a colander. I then rinsed them and separated the seeds from the “gunk” as best I could. I rinsed them again and then spread them on a paper towel to dry. When dry, I put approximately 1 squash worth of seeds in a small ziploc bag (I did 3 bags- red, orange and yellow). I added 7-10 drops of food coloring to each bag (might have been able to get away with fewer), sealed the bag, and then had the kids spread the food coloring onto the seeds with their fingers. I let them sit overnight and then spread them out over paper towels again to absorb any excess food coloring. They stuck a little to the paper towels, but I used a plastic knife to work them into a container. After that, the kids used paper and finger paints to paint a tree trunk and branches. Using seeds for the trunk is another option (pic above). They then glued the dyed seeds onto the branches creating their own fall foliage. I panicked when I realized we were out of glue sticks and would need to use the hot glue gun for this project. I wanted the kids to be able to participate, but I didn’t want anyone to get burned. So, I cut Q-tips in half and applied hot glue to the non-fluffy end. I then handed off to Chace, and he applied the glue to a seed and placed it on the tree. Andrew enjoyed handing me the seeds and watching me do the rest.


Note: We ended up adding more “foliage” than shown above. I needed a break after dropping hot glue onto my finger and burning it. Ugh.
No comments:
Post a Comment